33. Image filtering
[status: in progress]
33.1. Motivation, prerequisites, plan
33.1.1. Motivation
It hardly seems worth mentioning: nowadays image filtering seems to come up everywhere. We have explored some command-line filtering when looking at computer art in Section 32. Here we will look at manipulating images from Python programs. Some techniques we will learn are:
Blurring images.
Sharpening images.
Finding features in images.
33.1.2. Prerequisites
The 10-hour “serious programming” course.
Installing the python3-numpy, python3-scipy and python3-pil packages.
Being comfortable with user-level programs which manipulate images. Specifically, you should learn to run
eog,geeqie,convertandgimp.
33.1.3. Plan
We will first explore the filtering of images that can be done with ImageMagick on the command line. Then on to using the Pillow/PIL libraries to manipulate images in Python. Then we will use OpenCV for similar manipulation of static images.
Finally we will move on to getting comfortable with tensorflow, the machine learning library which can tackle so many areas of AI. We will use it to find objects in images and in video streams.
33.2. Manipulating images with command line programs
FIXME: to be written.
33.3. How computers store images, disk and memory
We have frequently seen files saved in a variety of image formats.
Probably the most common are .png and .jpg files, although
there are many other image formats as well.
When images are stored in memory the format can be quite different. We are more interested in the speed with which we our program can process the image, rather than its long term storage requirement on disk.
We seldom deal directly with the image storage: we almost always use function calls from a library. In our case we will use the Python Imaging Library Pillow (formerly called PIL), which has uses an abstract representation of the image in memory. This means that we do not have to understand the details of how it is stored.
33.4. First example: blurring and other effects with PIL
Here we show how to use the Pillow library (the new version of PIL, the Pythin Imaging Library). First we install the library with:
pip3 install Pillow
Then a simple example using an image file I got off the web. Try to
get your own, for example do a web image search for “person with cat”
and make sure you search for images that are “Labeled for reuse with
modification”. My image is called person-cat-small.jpg
from PIL import Image, ImageFilter  # imports the library

im_fname = 'person-cat-small.jpg'
original = Image.open(im_fname) # load an image from the hard drive
blurred = original.filter(ImageFilter.BLUR) # blur the image
embossed = original.filter(ImageFilter.EMBOSS) # emboss the image
contours = original.filter(ImageFilter.CONTOUR) # find contours

for img in (original, blurred, embossed, contours):
    img.show() # display all images
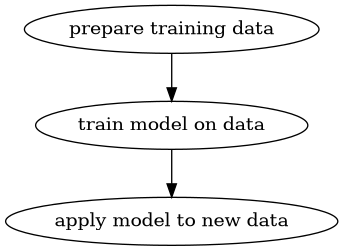
33.5. The cycle of training and running an AI system
The general cycle is that you train your model, and then apply it to data:
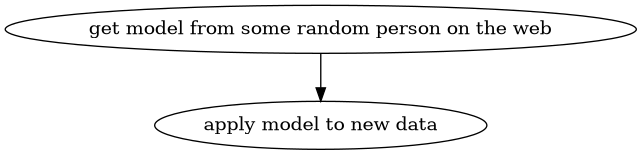
But sometimes you get a model which someone else has trained, so the cycle is:
33.6. Miscellaneous examples in various areas
33.6.1. Astronomy example with scipy image kit
You can find information on how to use Python to do astronomical image processing with Pillow, scikit-iamge and pyfits at:
http://prancer.physics.louisville.edu/astrowiki/index.php/Image_processing_with_Python_and_SciPy
And this article discusses the skyimage library used with matplotlib, including :
https://www.analyticsvidhya.com/blog/2014/12/image-processing-python-basics/
Both of those articles discuss finding stars within the images.
33.6.2. Extracting the portion of a scan which has text
33.6.3. Thresholding
33.7. Learning OpenCV
On a GNU/Linux system you can install OpenCV with
sudo apt install python3-opencv
33.7.1. numpy and opencv
https://medium.com/@manivannan_data/drawing-image-using-numpy-and-opencv-565abdbb3670
33.7.2. Image manipulation with OpenCV
Many tutorials on OpenCV are at:
33.7.2.1. Rotation
Let us use examples from:
Assuming your picture is called person-cat-small.jpg you can
try:
import cv2
import numpy as np

img = cv2.imread('person-cat-small.jpg', 0)

# show original image
cv2.imshow('img', img)
cv2.waitKey(0)
cv2.destroyAllWindows()

# now rotate it
rows,cols = img.shape
M = np.float32([[1,0,100],[0,1,50]])   ## make a rotation matrix
dst = cv2.warpAffine(img,M,(cols,rows))

# then show it
cv2.imshow('img',dst)
cv2.waitKey(0)
cv2.destroyAllWindows()
33.7.2.2. Finding objects
Some OpenCV sample images can be found at:
https://github.com/opencv/opencv/tree/master/samples/data
We download box.png and box_in_scene.png:
wget https://raw.githubusercontent.com/opencv/opencv/master/samples/data/box.png
wget https://raw.githubusercontent.com/opencv/opencv/master/samples/data/box_in_scene.png
Now following this page:
(but with some adjustments for OpenCV version 3, like ORB() -> ORB_create() and adding a None argument in the drawMatches() routine)
Try this:
import numpy as np
import cv2
from matplotlib import pyplot as plt

img1 = cv2.imread('box.png',0)          # queryImage
img2 = cv2.imread('box_in_scene.png',0) # trainImage

# Initiate SIFT detector
orb = cv2.ORB_create()

# find the keypoints and descriptors with SIFT
kp1, des1 = orb.detectAndCompute(img1,None)
kp2, des2 = orb.detectAndCompute(img2,None)

# create BFMatcher object
bf = cv2.BFMatcher(cv2.NORM_HAMMING, crossCheck=True)

# Match descriptors.
matches = bf.match(des1,des2)

# Sort them in the order of their distance.
matches = sorted(matches, key = lambda x:x.distance)

# Draw first 10 matches.
img3 = cv2.drawMatches(img1,kp1,img2,kp2,matches[:10], None, flags=2)

cv2.imwrite('object-matches.png', img3)

plt.imshow(img3),plt.show()
33.8. Using tensorflow with ImageAI to find objects
ImageAI offers the dream of a brief (they claim 10 lines!) python program that finds objects in images.
To install needed software use:
pip3 install tensorflow
pip3 install opencv-python
pip3 install keras
pip3 install imageai --upgrade
Let’s also mention what some of these components are:
- tensorflow
Google’s widely used machine learning library.
- OpenCV
A library for computer vision which allows the analysis of video streams
- Keras
A Python library offering an abstraction of the machine learning
33.8.1. ImageAI + tensorflow from Fritz AI article
Tutorials is at:
They have you download a data set with a model and a video:
wget https://github.com/OlafenwaMoses/ImageAI/releases/download/1.0/yolo.h5
wget https://github.com/OlafenwaMoses/IntelliP/raw/master/traffic-mini.mp4
33.8.1.1. From a fixed video file
Then put this program in a file called FirstVideoDetection.py
#! /usr/bin/env python3
from imageai.Detection import VideoObjectDetection
import os

execution_path = os.getcwd()

detector = VideoObjectDetection()
detector.setModelTypeAsYOLOv3()
detector.setModelPath( os.path.join(execution_path , "yolo.h5"))
detector.loadModel()

# input_video_path = os.path.join( execution_path, "improv.mp4")
input_video_path = os.path.join( execution_path, "traffic-mini.mp4")
# input_video_path = os.path.join( execution_path, "godzilla.mp4")
output_video_path = input_video_path[:-4] + '_detected_1'
video_path = detector.detectObjectsFromVideo(input_file_path=input_video_path,
                                             output_file_path=output_video_path,
                                             frames_per_second=29, log_progress=True)
print(video_path)
Now you can run it with:
$ chmod +x FirstVideoDetection.py
$ ./FirstVideoDetection.py
It will produce a file called traffic_mini_detected_1.avi
which you can view with your favorite video viewer – for example:
vlc traffic_mini_detected_1.avi
So that finds objects in moving images!
33.8.1.2. From your computer’s camera
This is much more exciting.
Put this program in a file called FirstCameraDetection.py
#! /usr/bin/env python3

from imageai.Detection import VideoObjectDetection
import os
import cv2

execution_path = os.getcwd()

camera = cv2.VideoCapture(0)

detector = VideoObjectDetection()
detector.setModelTypeAsYOLOv3()
detector.setModelPath(os.path.join(execution_path , "yolo.h5"))
detector.loadModel()

output_video_path=os.path.join(execution_path, "camera_detected_1")
video_path = detector.detectObjectsFromVideo(camera_input=camera,
                                             output_file_path=output_video_path,
                                             frames_per_second=29, log_progress=True)
print(video_path)
Now you can run it with:
$ chmod +x FirstCameraDetection.py
$ ./FirstCameraDetection.py
Note
You will have to interrupt the program yourself when you want to start collecting video. You can do this with control-c or control-
It will produce a file called camera_detected_1.avi
which you can view with your favorite video viewer – for example:
vlc camera_detected_1.avi
So that finds objects in moving images!
The web page referenced above describes the step-by-step explanation of what’s being done by the ImageAI and Tensorflow libraries as you run both of these programs.
33.8.2. ImageAI + tensorflow from towarddatascience
Tutorial is at:
https://towardsdatascience.com/object-detection-with-10-lines-of-code-d6cb4d86f606
They use a pre-defined model that finds people and vehicles and
backpacks. This is in the file resnet50_coco_best_v2.0.1.h5
We must get the hdf5 file with model weights:
wget https://github.com/OlafenwaMoses/ImageAI/releases/download/1.0/resnet50_coco_best_v2.0.1.h5
from imageai.Detection import ObjectDetection
import os

execution_path = os.getcwd()

detector = ObjectDetection()
detector.setModelTypeAsRetinaNet()
detector.setModelPath( os.path.join(execution_path , "resnet50_coco_best_v2.0.1.h5"))
detector.loadModel()
detections = detector.detectObjectsFromImage(input_image=os.path.join(execution_path , "image.jpg"), output_image_path=os.path.join(execution_path , "imagenew.jpg"))

for eachObject in detections:
    print(eachObject["name"] , " : " , eachObject["percentage_probability"] )
33.9. Using tensorflow from their own tutorials
Warning
At this time the versions of all the libraries are not working well at crucial points where you save and reload a model.
33.9.1. The tutorial from tensorflow.org
Install with:
pip3 install tensorflow
pip3 install numpy
pip3 install scipy
pip3 install pillow
pip3 install matplotlib
pip3 install h5py
pip3 install keras=2.3.1
Following:
https://www.tensorflow.org/tutorials/quickstart/beginner
Now run this in python:
import tensorflow as tf

# set eager execution - we will need it when we call model(...).numpy()
tf.enable_eager_execution()

# Load and prepare the MNIST dataset. Convert the samples from
# integers to floating-point numbers:

mnist = tf.keras.datasets.mnist

(x_train, y_train), (x_test, y_test) = mnist.load_data()
x_train, x_test = x_train / 255.0, x_test / 255.0

# Build the tf.keras.Sequential model by stacking layers. Choose
# an optimizer and loss function for training:

model = tf.keras.models.Sequential([
    tf.keras.layers.Flatten(input_shape=(28, 28)),
    tf.keras.layers.Dense(128, activation='relu'),
    tf.keras.layers.Dropout(0.2),
    tf.keras.layers.Dense(10)
    ])

# For each example the model returns a vector of "logits" or
# "log-odds" scores, one for each class.

predictions = model(x_train[:1]).numpy()
predictions

# result should be:
# array([[-0.40252417, -0.36244553, -0.6254247 ,  0.3470046 ,  0.53377753,
#         -0.25291196,  0.42313334, -0.85892683,  0.16624598,  0.01534149]],
#       dtype=float32)

# The tf.nn.softmax function converts these logits to
# "probabilities" for each class:

tf.nn.softmax(predictions).numpy()

# result should be:
# array([[0.06724608, 0.06999595, 0.05380994, 0.14229287, 0.17151323,
#         0.07809851, 0.15354846, 0.04260433, 0.11876287, 0.10212774]],
#       dtype=float32)

# Note: It is possible to bake this tf.nn.softmax in as the
# activation function for the last layer of the network. While
# this can make the model output more directly interpretable,
# this approach is discouraged as it's impossible to provide an
# exact and numerically stable loss calculation for all models
# when using a softmax output.

# The losses.SparseCategoricalCrossentropy loss takes a
# vector of logits and a True index and returns a scalar loss
# for each example.

loss_fn = tf.keras.losses.SparseCategoricalCrossentropy(from_logits=True)

# This loss is equal to the negative log probability of the true
# class: It is zero if the model is sure of the correct class.

# This untrained model gives probabilities close to random (1/10
# for each class), so the initial loss should be close to
# -tf.log(1/10) ~= 2.3.

loss_fn(y_train[:1], predictions).numpy()

# should be 2.5497844

model.compile(optimizer='adam',
              loss=loss_fn,
              metrics=['accuracy'])

# The Model.fit method adjusts the model parameters to minimize the
# loss:

model.fit(x_train, y_train, epochs=5)

# The Model.evaluate method checks the models performance, usually
# on a "Validation-set" or "Test-set".

model.evaluate(x_test,  y_test, verbose=2)

# The image classifier is now trained to ~98% accuracy on this
# dataset. To learn more, read the TensorFlow tutorials.

# If you want your model to return a probability, you can wrap the
# trained model, and attach the softmax to it:

probability_model = tf.keras.Sequential([
                             model,
                             tf.keras.layers.Softmax()
                             ])

probability_model(x_test[:5])
33.9.2. For more on training the network
https://www.datacamp.com/community/tutorials/tensorflow-tutorial
33.9.3. The most complete tutorial on preparing training sets and doing the training
Run through this example of cats and dogs:
https://www.tensorflow.org/tutorials/images/classification
It all works. There is only one typo where they have “accuracy” instead of “acc” in a few places, and it’s easy to fix.
It is quite long because it trains poorly and then really well.
Save with:
os.system(“mkdir -p saved_models/”) model.save(‘saved_models/cats_dogs_initial.h5’) model_new.save(‘saved_models/cats_dogs_improved.h5’)