4. ssh and git setup and explorations
4.1. Motivation and plan
I consider ssh to be one of the most useful and most ingenious programs ever written. I use it to:
Log in to other hosts, with authentication that is both secure and convenient, and full encryption of the connection text.
Authenticate to version control servers like codeberg, gitlab, and others.
Run graphical programs on a remote host using ssh’s clever creation of an ad-hoc X server on the remote host which tunnels back to the local host’s display.
Forward ports through encrypted tunnels for a variety of services.
ssh uses an approach to encryption called public-key cryptography at various points in its inner workings to encrypt credentials and traffic. This means that among other things you will be creating a private/public key pair.
In addition to its functionality, ssh also has an approach to authentication that I use regularly, the ssh agent. This allows you to enter a passphrase just once on your main display, and that authentication will be passed forward down a chain of ssh connections so you do not have to type passwords anymore.
Let us go on a romp through that part of the world of ssh that I use and get ready to use it in our workflows. Our steps will be to (a) create a private/public key pair for ssh; (b) test that logging in to our own laptop; (c) attaching our ssh public key to web services like codeberg and gitlab.
4.2. Your console, and the ssh setup
A bit of jargon before we begin. We will have the idea of the “first host you log in to”. This can be called your console, or your workstation. It is the first computer you log in to, typically the one to which your keyboard and mouse are attached. I will call this host your console or your workstation.
We will test by logging in to your current machine, so make sure you install the ssh server. Example: on debian-based linux distributions you can type something like:
$ sudo apt install openssh-server
4.2.1. Create the public/private keys
Log in to your console, and open up a terminal.
Warning
do you already have an ssh setup?
If so we do not want to mess things up. Try typing:
$ ls -last ~/.ssh/
and if that directory exists and has in it files that start with
id_rsa or id_ed25519 or something similar, then stop.
You seem to already have an ssh setup, and you need to decide out
if you want to resurrect that old ssh setup or to wipe it out and
start from scratch.
If you have no .ssh directory at all, or a .ssh directory
with no public or private keys (those id_ files), then you can
continue with what we are doing here.
Before we run the command to create the ssh private and public key pair, please understand the idea of a passphrase. A good discussion of it is given by the xkcd webcomic on password strength at https://xkcd.com/936/
Now run:
$ ssh-keygen
and use the default location for the key files, and give it a passphrase that you choose.
4.2.2. Using ssh to log in to this host
Now verify that you can log in to the current host - you will have to type your password:
$ ssh localhost # or sometimes ssh 127.0.0.1
It should ask you for a password and then log you in. Note that you are on the same host you were on before, but you’ve gone through a layer of remote login. Make sure you now log out of that with:
$ exit
so you are back to your plain terminal. This is so important that you
might even want to continue typing exit until the terminal is
gone, and then open a new one.
Now the crucial step of setting up your authorized_keys file to
let yourself in without a password. You do this by putting your
public key in the ~/.ssh/authorized_keys file on the remote
host. (Note: we are pretending that this computer is also the
“remote” host.)
$ cat ~/.ssh/id_ed25519.pub >> ~/.ssh/authorized_keys
$ # (or this might be cat ~/.ssh/id_rsa.pub >> ~/.ssh/authorized_keys)
$ chmod 600 ~/.ssh/authorized_keys
Now you should be able to this again:
$ ssh localhost # or sometimes ssh 127.0.0.1
and now it should ask you for your passphrase with a graphical pop-up dialog.
And of course make sure you exit from all that:
$ exit
$ # you might even want to fully exit the terminal
4.2.3. Agent forwarding and X11 forwarding
In software development you might log in to remote hosts often, and
then need to access yet other hosts, in a whole chain of ssh
connections. Because of this there are a couple of useful settings
for your ~/.ssh/config file. Edit that file and put these two lines
at the top:
ForwardX11 yes
ForwardAgent yes
and after saving type:
$ chmod 600 ~/.ssh/config
4.3. Using ssh to authenticate with remote git servers
Remote git servers like codeberg, gitlab, github, … allow you to upload your ssh public key to them, using their web interface.
I will use codeberg as an example, but the others all have analogous settings to enter your ssh public key.
4.3.1. The details to add your key
Log in to codeberg and find the top level user menu (upper right), then pick “settings”, and in there pick “SSH/GPG keys”. See the following figures:
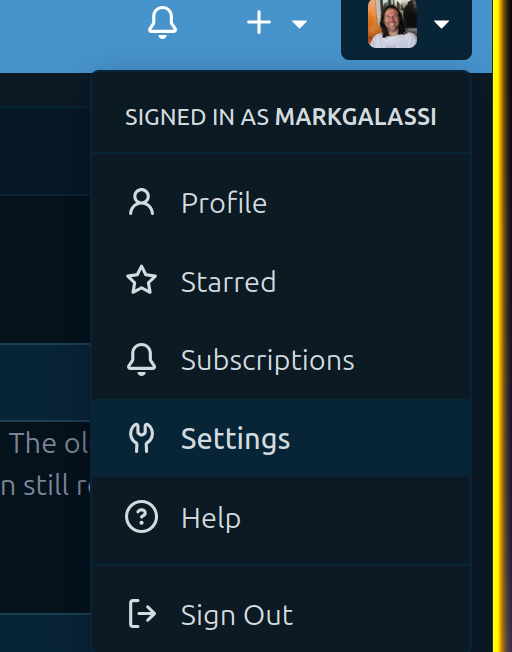
Figure 4.3.1.1 The codeberg personal menu - pick the “settings” item.
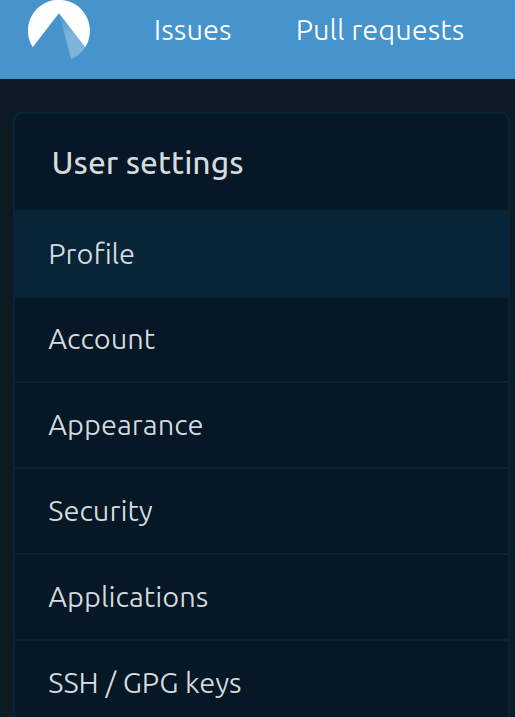
Figure 4.3.1.2 Here you pick the “SSH/GPG keys” item.
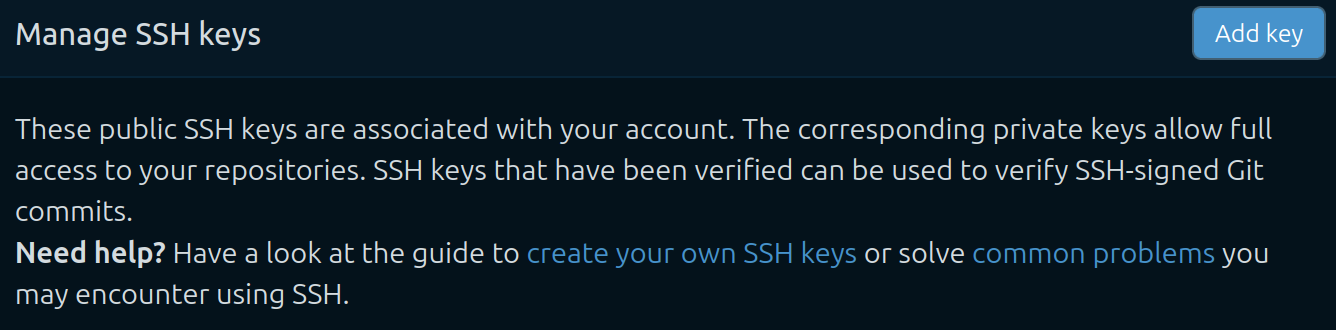
Figure 4.3.1.3 Top level for key management - click the “Add key” button.
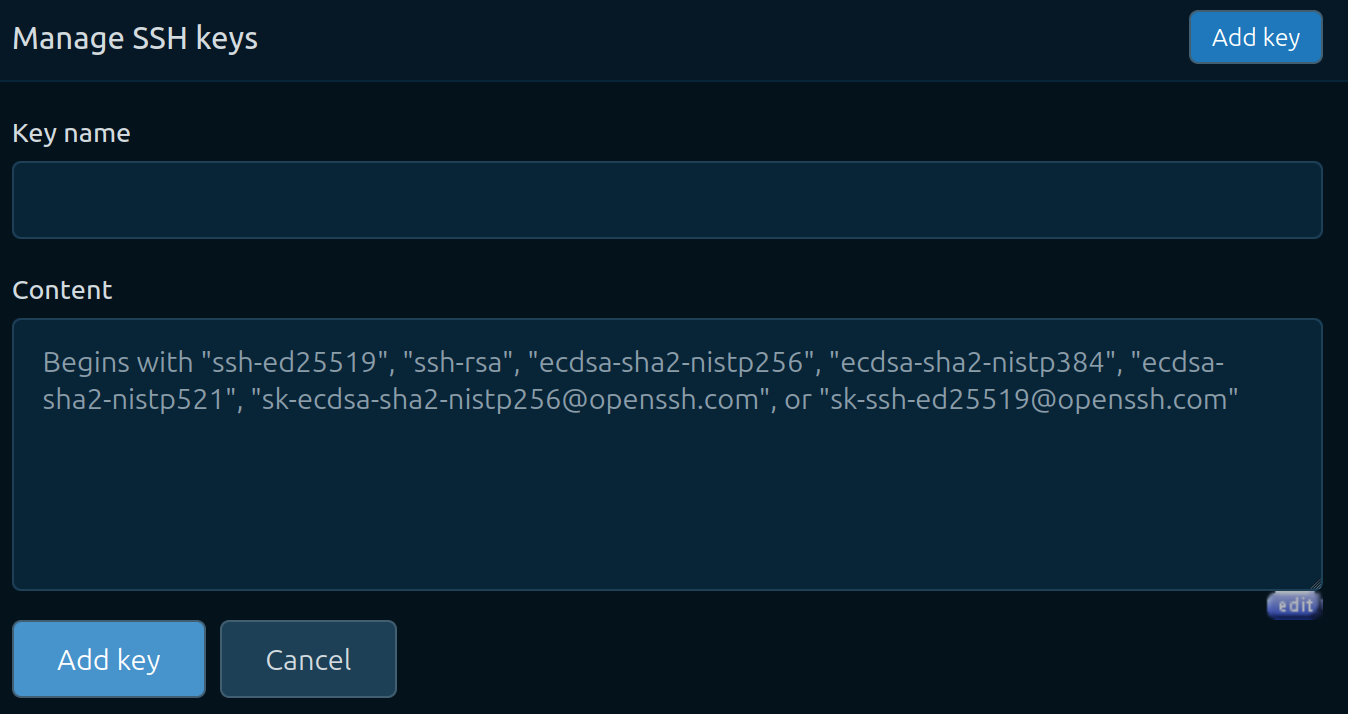
Figure 4.3.1.4 Ready for pasting in the ssh public key.
$ cat .ssh/id_ed25519.pub
ssh-ed25519 AAAAC3NzaC1lZDI1NTE5AAAAINImmL9El2c8Mm747liAa0f5TCjXXtEXjqyfQCdU65lc markgalassi@dongiovanni
$
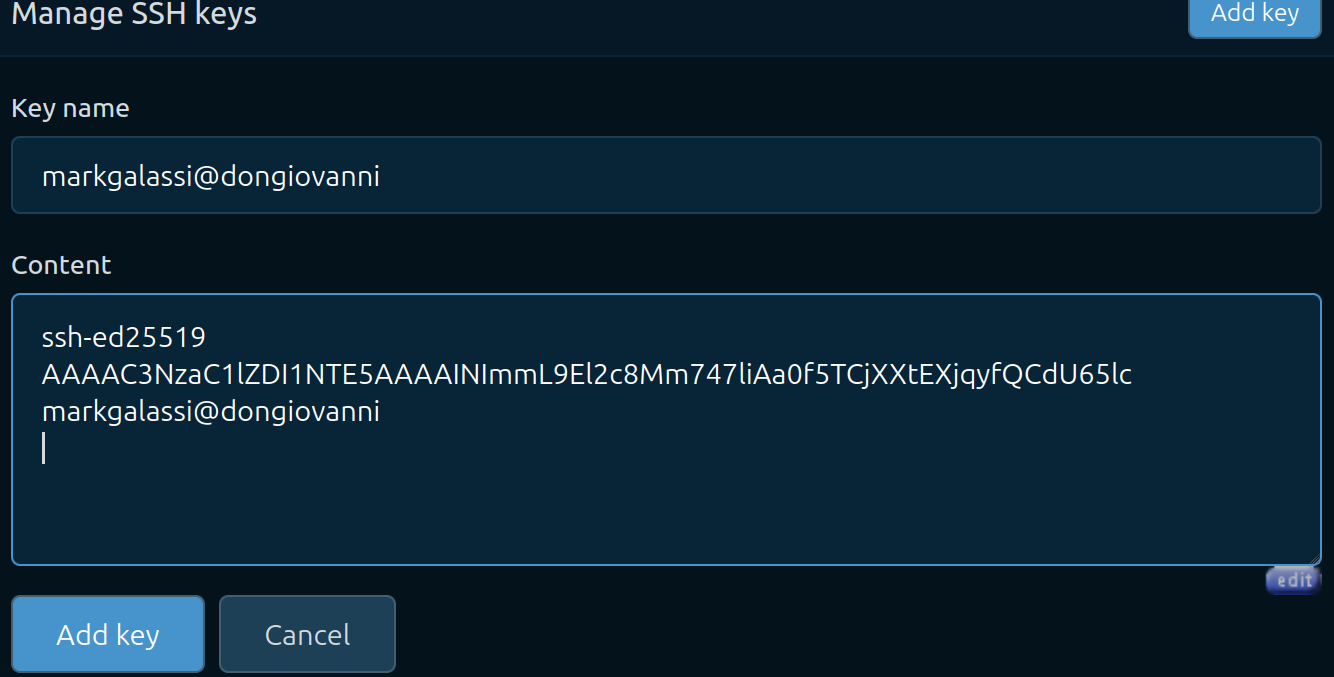
Figure 4.3.1.5 After pasting in the ssh public key.
4.3.2. Testing if the key has been added well
Start by cloning my repo. If you have an account on codeberg you can run:
$ git clone ssh://git@codeberg.org/markgalassi/serious-programming-courses.git
Or if you have an account on github you can clone a github repo, for example with:
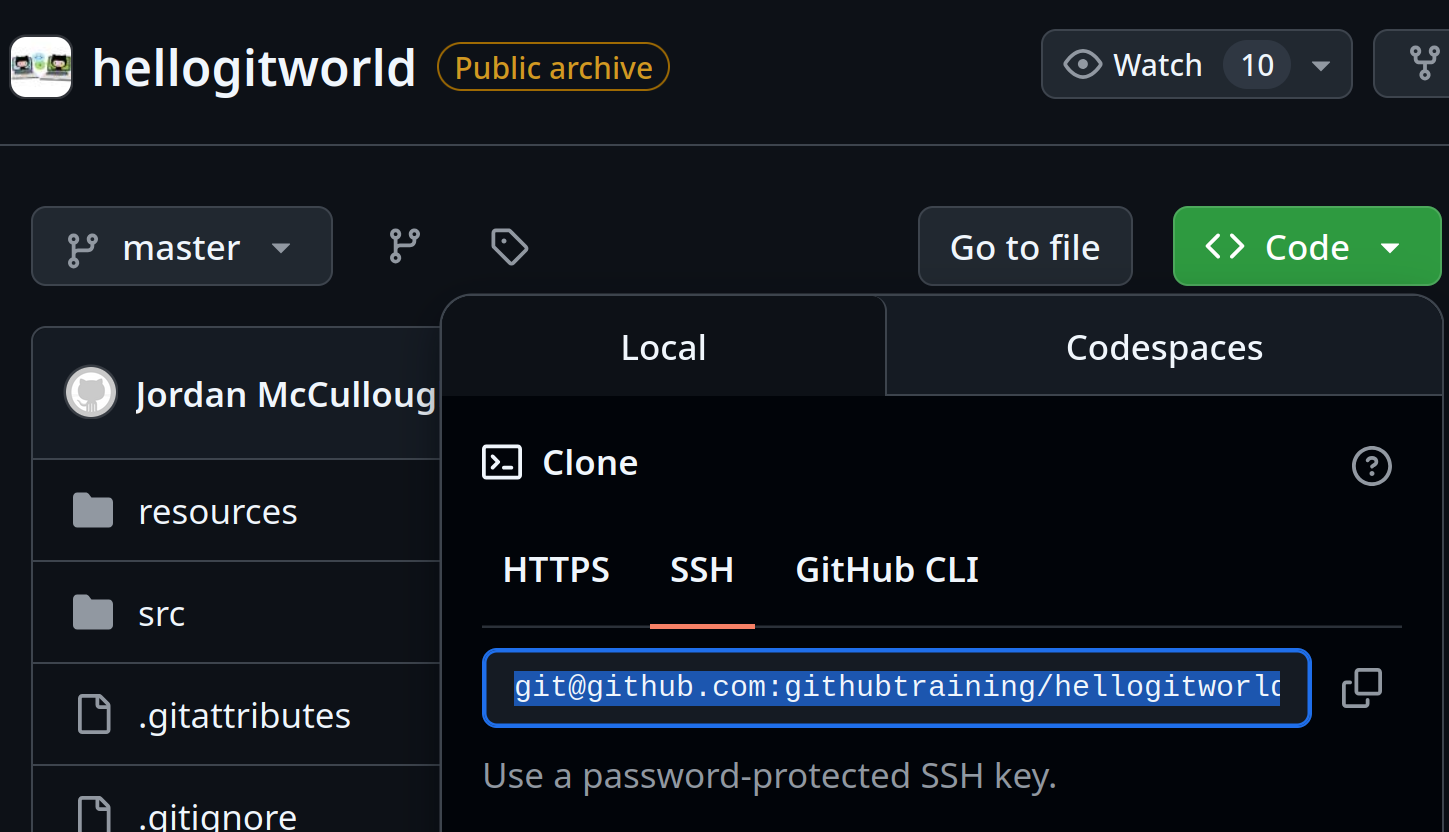
Figure 4.3.2.1 The ssh clone URL from github.
$ git clone git@github.com:githubtraining/hellogitworld.git
4.4. Creating your own git repo and having a git workflow
You will want to create yourself a software repository on codeberg (or gitlab or github or …)
Then you will clone it as we I showed above.
When teaching this I then create an on-the-fly codeberg repo, clone it, and demonstrate the workflow of:
Once per project: create repo and git clone
Once per creation of a new file: git add
Frequently, every time you make a change: git commit -a
Frequently, almost every time you make a change: git push
Following the gitlab docs on git you might think of it this way:
4.4.1. One time setup
$ git config --global user.name "FirstName LastName"
$ git config --global user.email "user@domain.tld"
$ git config --global --list
4.4.2. One time per project
If you are creating a new project:
$ git init .
If you are cloning an existing project from somewhere (for example a codeberg repo you have just created):
$ git clone git@someplace.tld:/path/to/master/reponame
$ cd reponame
4.4.3. One time when you add new files
$ echo "int main() { return 0; }" > trivial.c
$ git add trivial.c
$ git commit -a
  # create a useful log message
$ git push  ## synchronize out to other people's code
Of course you should create your programs with your programming
editor - in the example above I just created a trivial .c file
with a one-liner in the shell, but you will eventually create real
significant files with your editor.
4.4.4. Daily work flow
$ git pull  ## pulls in what other people have been doing
  # Edit code and save.
$ git commit -a
  # create a useful log message
$ git push  ## synchronize out to other people's code
4.4.5. Taking stock
$ git log  ## detailed information on what's been happening
$ git tag release-1.5 ## reproducibly define a release
4.5. The minimum you should have in a version control repo
- license
You should have a license. If there is no extremely strong and specific reason to do otherwise, use GPLv3. Both codeberg and gitlab have menus to pick a license and it will put the license file there for you when you choose something like “GNU General Public License (GPL) v3”. Naming the file
LICENSEusually works well.- README
Or
README.mdorREADME.rst. This file needs to show how someone can start from scratch, clone your repo, and use programs in your repo to generate some result. You should have “end-to-end” generation of a plot with simple copy+paste from your README file to the command line.And remember: the commands should be on lines by themselves, so that your users do not have to carefully select - they should simply triple-click to get your line of code. I discuss README files in more detail below.
- programs not notebooks (for python code)
Some people use jupyter notebooks to explore datasets. I very strongly recommend avoiding the habit of jupyter notebooks because then people do not write good programs. But whether you use jupyter notebooks or not, the code you put in your repository should be a python program rather than the notebook, so that it can run reproducibly and produce a result unattended.
If you want to use jupyter notebooks, make sure that you put all your code in functions (you should do this anyway), and call those functions from your notebook.
4.6. More on what makes for a good README file
Remember the principle that your repo must allow you to reproducibly from source files you have created to all your final outputs.
This must all be doable with unattended command line commands. (There are very few exceptions to this.)
For example, let us say that you have a repository with the following programs:
- calculate_pressure.c
A program that applies a physics equation of state (for example the ideal gas law) to calculate pressure of a gas given temperature and volume. It writes the output to a file. It needs to know temperature and volume, so we accept those as command-line parameters.
- plot_pressure.py
A program that uses the matplotlib library to plot pressure as a function of temperature and volume.
You have also written a paper (in a file called
pressure_studies.tex) describing the work and showing a plot,
which will be saved (by plot_pressure.py) in a file called
p_vs_T_and_V.pdf
In this case you will have the following files in your repository:
README.md, LICENSE, calculate_pressure.c,
plot_pressure.py, pressure_studies.tex
Your typical work flow is:
Edit your
.c,.py, and.texfiles.Build the C source with:
gcc -o calculate_pressure calculate_pressure.c -lmRun the program with
./calculate_pressure 14.1 4.8 > pressure_14.1-3_4.8.outSometimes run a sweep of temperatures and volumes with:
for temp in 1 2 3 4 5 6 7 8 9 10 11 12 13 14 15; do
    for vol in 0.5 1 1.5 2 2.5 3 3.5 4 4.5 5; do
        out_fname=pressure_${temp}_${vol}.out
        echo "running temperature $temp and volume $vol - output in $out_fname"
        ./calculate_pressure $temp $vol > $out_fname
    done
done
Make plots:
./plot_pressure.py pressure_*_*.outRebuild the paper:
pdflatex pressure_studies.tex
The README.md file must start with a brief conceptual note and then
quickly get into the meat of how to produce results. Here is a sample
README.md file which covers this situation:
sample-README.md
I also show the file here:
sample-README.md# pressure_studies - a suite of programs to study equations of state
## What is this?
pressure_studies is a simple set of programs to calculate and plot
pressure. There is also a paper describing the physics in detail.
## Prerequisites
You will need a C compiler. On a debian system you can install it
with:
```
sudo apt install gcc
```
You will also need the matplotlib library for python. You can install
that with:
```
sudo apt install python3-matplotlib
```
Note that you might be using specific python packaging approaches, in
which case you will need to install matplotlib according to that
idiom. Our use of it is rather simple, installation with apt might be
sufficient for most people.
## How to run the program and make plots
You can compile and run the program with:
```
gcc -o calculate_pressure calculate_pressure.c -lm
./calculate_pressure 14.1 4.8 > pressure_14.1-3_4.8.out
```
You can then make a sweep of temperatures and volumes, thus allowing
you to make plots, with:
```
for temp in 1 2 3 4 5 6 7 8 9 10 11 12 13 14 15; do
for vol in 0.5 1 1.5 2 2.5 3 3.5 4 4.5 5; do
out_fname=pressure_${temp}_${vol}.out
echo "running temperature $temp and volume $vol - output in $out_fname"
./calculate_pressure $temp $vol > $out_fname
done
done
```
After that sweep you now have enough output to make a plot with:
```
./plot_pressure.py pressure_*_*.out
```
This will create files called p_vs_T_and_V.png and p_vs_T_and_V.pdf
## Building the paper
Once you have made the plot you can build the paper with:
```
pdflatex pressure_studies.tex
```
and you will then be able to read it in the pdf file
pressure_studies.pdf
Note
Notice how every command that the user should type in to reproduce the results is on a line by itself. This lets the user triple-click and paste that into a terminal directly.
Note
Notice how the prerequisites were mentioned.