13. Cloud virtual machines
13.1. Motivation and plan
It is frequently a better idea to let someone else manage the hardware and networking needs for your computer servers. There are companies which offer virtual machines that you configure through the web and access through the web or with ssh. This can cost less than reproducing and supporting the entire infrastructure in-house.
Plan: in this chapter we will take the work we did with VMs in Section 10 and investigate putting those machines “in the cloud”.
As for our physical VMs we will:
Choose VM guest OSes (example: Debian unstable, Ubuntu 16.04, CentOS 7)
Choose up to three “killer apps” – web-based applications to run off of these machines (examples: OwnCloud, ArchivesSpace, Trac, Jenkins, MediaWiki, a simple Django backend you can write up, a backup server…)
Prerequisites:
You should have the GNU/Linux installation images you downloaded in Section 10.3 and which you might have placed in
/usr/local/src/cd-images/You should be familiar with the basics of VMs that we covered in Section 10
13.2. Linode
Preparation:
Installation from GUI
Automated installation
13.3. Dreamhost
Preparation:
Installation from GUI
Automated installation
13.4. Google cloud
13.4.1. Preparation of a google cloud free trial
Read about the cloud concepts at:
https://cloud.google.com/docs/overview/
We will install the google cloud SDK so as to have command line tools available. Run:
sudo mkdir -p /usr/local/src
sudo chown $LOGNAME /usr/local/src
cd /usr/local/src/
wget https://dl.google.com/dl/cloudsdk/channels/rapid/downloads/google-cloud-sdk-171.0.0-linux-x86_64.tar.gz
tar zxvf google-cloud-sdk-171.0.0-linux-x86_64.tar.gz
./google-cloud-sdk/install.sh
But we will start with the google cloud management web interface at https://console.cloud.google.com/start and shown in Figure 13.4.1.1:
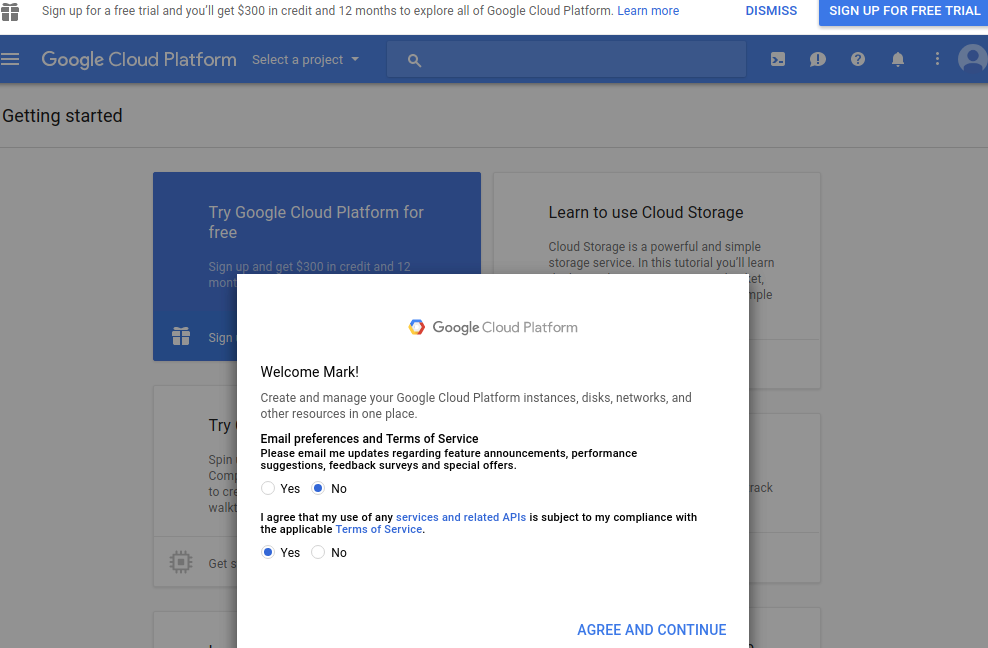
Figure 13.4.1.1 The first-time screen at https://console.cloud.google.com/start where you can see that they give you the option to sign up for a free trial.
Go ahead and sign up for the free tryout option. You could say “no” to the promotional email option, and “yes” to the “I have read and agree to the terms of service” option, and so forth.
Then you should probably pick the “individual” profile.
You are now put into a dashboard for google cloud services.
13.4.2. A couple of concepts before we go further in the google cloud
Before we create our first VM let us first understand some of the terminology thrown at us in the top level dashboard.
The main distinction we need to get started is to understand what’s a project and what’s an instance. An instance in our case is a single virtual machine. A project is a collection of one or more VMs.

Figure 13.4.2.1 The relationship between the project and the VMs: one project can have several VMs.
This means that we will first create a project (one was created for us at the start), and within that project we will create a new VM. VMs are sometimes called “instances”.
Once we are making a specific single VM you will find a strong similarity to how we created VMs on our own computer in Section 10: we will specify similar parameters, such as memory, hard disk space, operating system choice, …
13.4.3. Creating a project in the google cloud
You should now be looking at the dashboard at the URL https://console.cloud.google.com/start and shown in Figure 13.4.3.1.

Figure 13.4.3.1 The google cloud dashboard at https://console.cloud.google.com/start.
From here you can go to the “Select a project” menu in the top bar,
which will give you a dialog that lets you hit the + button and
create a new project.
Take the following steps to create the project:
Choose a project name. We always recommend not using spaces in such names, so that we will have an easier time later with the API. You could chose
learn-google-cloudYou will notice that the web page then assigns you a project ID.Hit the “Create” button.
Give it some time until the bell icon in the upper right stops circling and becomes a circle with a number in it.
Now you can go back to the “Select a project” menu from Figure 13.4.3.1 and pick your project
learn-google-cloud, and you will be in the console for that project.
You now have a project and you can move on to making yourself a VM.
13.4.4. Creating a VM in the google cloud
To create a VM in this project you can click the “Compute engine”
button in the left hand side panel. (If the left hand side panel is
now showing you can enable it with the menu icon  .)
.)
This will bring you to the “VM instances” screen shown in Figure 13.4.4.1.
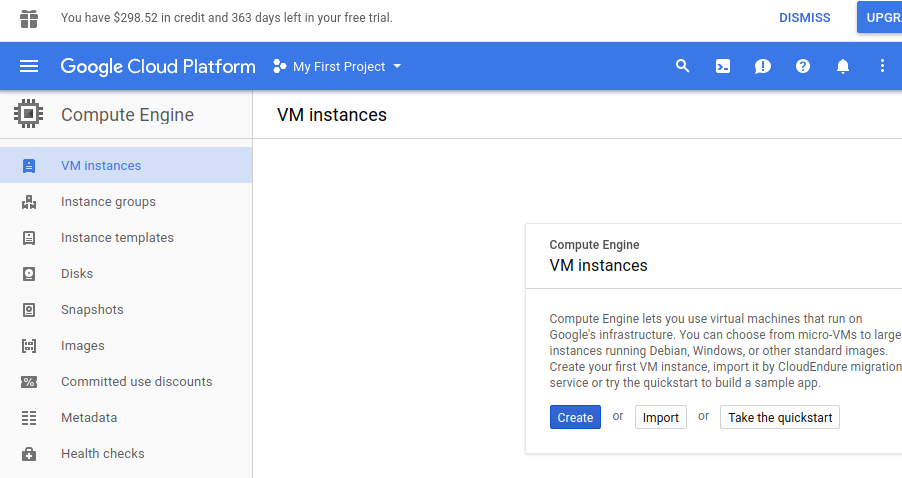
Figure 13.4.4.1 Google cloud VM instances screen before you create any hosts. You
get the left panel by clicking on the menu icon . Note
the “Create” button in the dialog.
You should probably explore many of these options, but for now let us start with a simple Ubuntu 16.04 instance. After a few minutes you will have it ready to go.
Take the following steps to create yourself an ubuntu 16.04 VM:
Click the “Create” button.
Give it a hostname (we used “sample-ubuntu16”).
Leave it in the US geographical region that google picks for you, unless you have a preference.
For our current purpose you can leave the default rather small computer: not much RAM, just one core. This can be changed later.
But change the “Boot disk” to choose Ubuntu 16.04 and its hard drive space to be 30 gigabytes.
Change the “Acces scopes” to be “Allow full access to all Cloud APIs”.
Change to allow both http and https traffic.
For now make it non-preemptible, but when we come up with a recipe to restore the machine quickly we should change it to be preemptible since it costs much less. It is interesting to read up on this at https://cloud.google.com/compute/docs/instances/preemptible
Hit the “Create” button.
13.4.5. Connecting to the VM with ssh
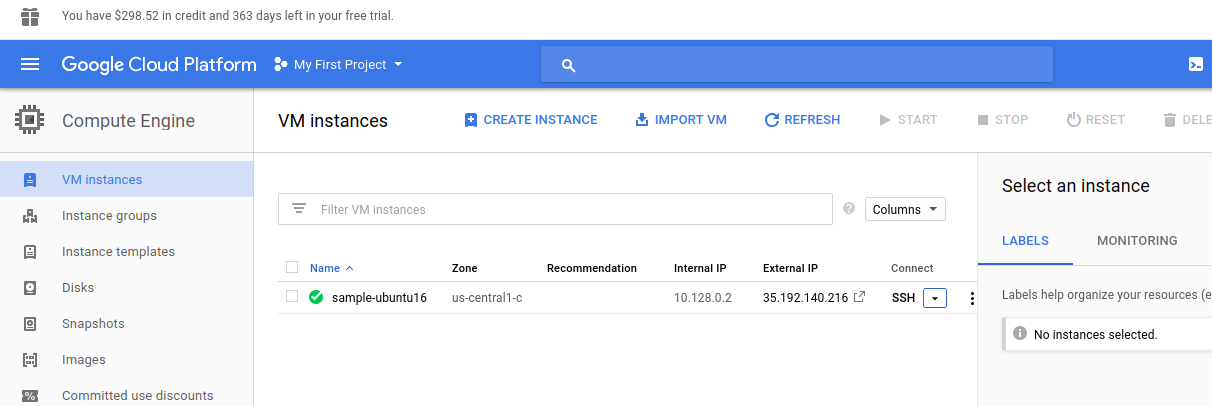
Figure 13.4.5.1 Google cloud VM instances screen. Note that the one instance we
have, sample-ubuntu16, has an SSH menu.
The instance we have, which we called sample-ubuntu16 (see
Figure 13.4.5.1), has a “Connect” menu whose
first item will let you open an ssh session into the VM. It also
shows the hosts externally visible IP address, in this case
35.192.140.216
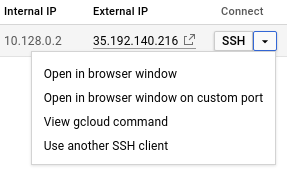
Figure 13.4.5.2 Google cloud VM instances -> Connect menu. The first item will open a browser-based ssh client into the host.
We recommend coming in with ssh from your own machine rather than using the browser-based ssh session, so just use the browser-based ssh client to set yourself up with ssh. One way is to run the following commands in the VM browser-based ssh session:
mkdir -p .ssh
chmod 700 .ssh
scp YOUR_MACHINE_ADDRESS:.ssh/id_rsa.pub ~/.ssh/authorized_keys.mine
cat ~/.ssh/authorized_keys.mine >> ~/.ssh/authorized_keys
chmod 600 ~/.ssh/authorized_keys
At this point you can run ssh 35.192.140.216 (or whatever your IP
address is) and you’re in! Note that your google login name might be
different from the login name on your main host. In that case you
might need to do something like ssh
your_google_login@35.192.140.216
This is a significant accomplishment: being able to ssh from your workstation into the cloud VM, and then being able to do anything on the command line on your VM, means that you can now do everything with this machine as if it were on your desk.
13.5. Amazon cloud
13.5.1. Preparation of an amazon cloud free trial
Point a browser to https://aws.amazon.com/free/ and choose the “Create a Free Account” button. Fill out the details for your account. Since you might end up using this account from an API it’s a good idea to not use spaces in the account name.
You will have to go through several screens to set up and authenticate your account.
At the URL https://aws.amazon.com/getting-started/ you will find a series of tutorials. We will follow the instructions in https://aws.amazon.com/getting-started/tutorials/launch-a-virtual-machine/
Start by going to https://aws.amazon.com/console/ and then hit the “Sign in to the Console” button. If you expand the “All services” menu you will see a list of many things you can do. At the very top you will find “Compute”, and there you can select “EC2” which is Amazon’s basic “I want to run a VM” option.
Select the EC2 option, and in there choose “Launch Instance”.
You will now be prompted for a choice of an operating system image. We will use the “Ubuntu Server 16.04 LTS” which you will see is “Free tier eligible”.
Once you pick Ubuntu 16.04 you find yourself in a screen where you
choose the VM configuration. Only one of them is “Free tier
eligible”, which at the time of writing is the t2_micro type with
1 CPU and 1 gigabyte of RAM.
Since there is almost nothing you can change to still have a free instance on the amazon cloud, go ahead and jump straight to “review and launch”.
You will now be asked to set up a key pair, which you should do so
that you can ssh in to this VM later. It will have you save a
.pem file which you will need soon.
You will now have a “Launch Status” page shown in Figure 13.5.1.1
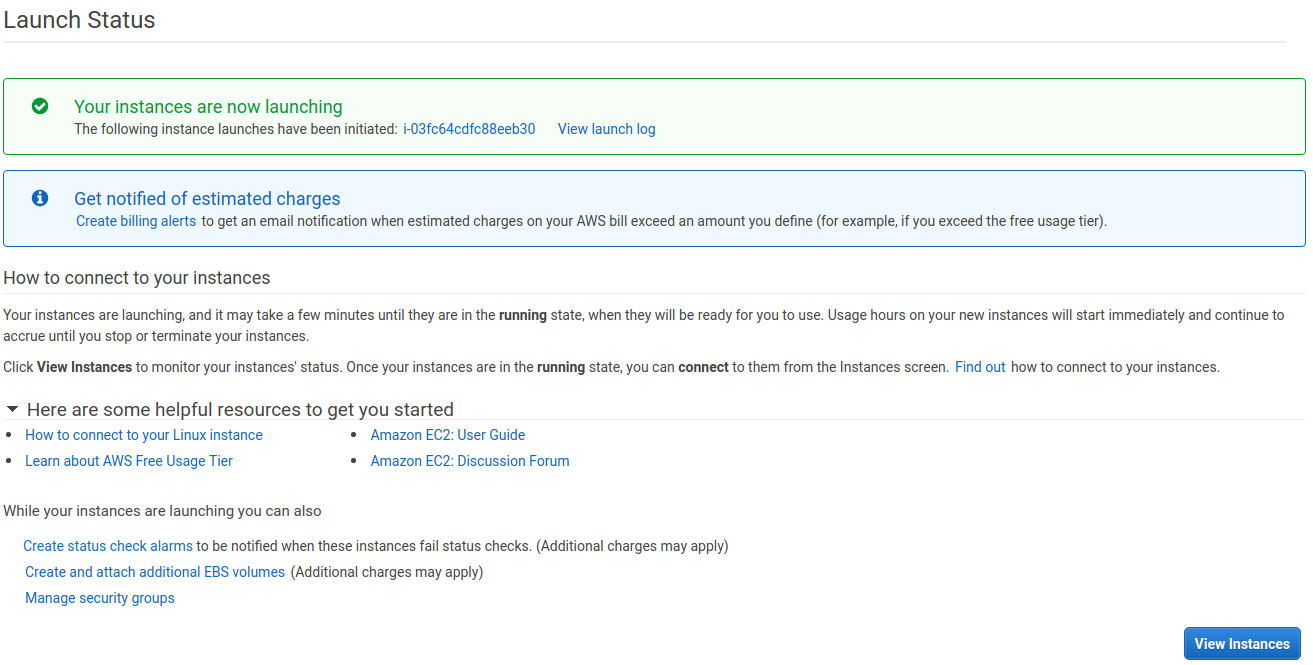
Figure 13.5.1.1 Amazon cloud launch status. Your VM is ready and this screen points to information on how to make connections. The “View Instances” button will take you your dashboard.
Click on “View Instances” to get to a dashboard listing your amazon
VMs (the list probably has only this VM that we just created). You
can select your VM and then click on “Connect” and it will tell youhow
to ssh in to it. Assuming that you saved your credentials file as
myawscredentials.pem and that the hostname is
ubuntu@ec2-34-213-178-155.us-west-2.compute.amazonaws.com, the
procedure might look like this:
mkdir -p ~/.ssh/
cp myawscredentials.pem ~/.ssh/
chmod 400 ~/.ssh/myawscredentials.pem
ssh-add ~/.ssh/myawscredentials.pem
ssh -i ~/.ssh/myawscredentials.pem ubuntu@ec2-34-213-178-155.us-west-2.compute.amazonaws.com
Once have logged in you can make yourself your own account and bring in your own ssh public key by running the following on the amazon cloud machine:
sudo adduser --ingroup myloginname  ## then answer all the questions
sudo usermod -a -G admin myloginname  ## give yourself sudo privilege
sudo su - myloginname
mkdir -p .ssh
chmod 700 .ssh
scp yourloginname@YOUR_MACHINE_ADDRESS:.ssh/id_rsa.pub ~/.ssh/authorized_keys.mine
cat ~/.ssh/authorized_keys.mine >> ~/.ssh/authorized_keys
chmod 600 ~/.ssh/authorized_keys
You can now exit and log in with your account using
ssh yourloginname@ec2-34-213-178-155.us-west-2.compute.amazonaws.com
You are now ready to compute on this new machine.